Share on Facebook
 Share on LinkedIn
 Share on Twitter

Struggling with repetitive tasks in Acumatica? Wish you could automate workflows without complex coding?
You’re in the right place. In this article, we’ll show you how to connect Acumatica to Power Automate step by step. But first, let’s break down why this integration matters, who needs it, and what problems it solves.
What is Power Automate?
Power Automate is Microsoft’s no-code automation tool that helps businesses connect apps, services, and data without manual effort. With Power Automate, you can:
✅ Automate repetitive tasks like approvals, data entry, and notifications.
✅ Sync data across platforms (e.g., Acumatica ↔️ Outlook, SharePoint, CRM).
✅ Trigger actions based on events (e.g., “When a new invoice is created in Acumatica, send a notification to Teams”).
Who Uses Power Automate?
• Business Analysts & IT Teams – to integrate systems without coding.
• Finance & Accounting Teams – to automate invoicing, payments, and approvals.
• Sales & Customer Support – to sync leads, customer data, and support cases.
In short, Power Automate saves time and reduces human errors by letting Acumatica work with the tools you already use.
Why Connect Acumatica to Power Automate?
Acumatica is a powerful ERP, but manual data entry, disconnected systems, and repetitive workflows slow businesses down. By integrating Acumatica with Power Automate, you can:
🚀 Eliminate manual work – No more copying and pasting data between apps.
🚀 Ensure real-time updates – Keep records synchronized without delays.
🚀 Improve accuracy – Reduce human errors in workflows like invoicing or inventory tracking.
🚀 Increase productivity – Free up your team to focus on higher-value tasks.
Who Needs the Acumatica Connector for Power Automate?
If you:
✅ Manually update records across Acumatica and other systems.
✅ Rely on spreadsheets or emails for tracking invoices, sales orders, or inventory.
✅ Use Microsoft 365, SharePoint, Teams, or CRMs like Salesforce or HubSpot and want them to talk to Acumatica.
✅ Want to automate approvals, notifications, and reporting to save time, Then this connector is built for you.
Step-by-Step Guide: How to Connect Acumatica to Power Automate
🎯 Now, let’s get into the setup. Below is a detailed guide with screenshots to help you establish a secure connection between Acumatica and Power Automate.
Navigate to https://make.powerautomate.com and sign in there if you have not yet signed in.
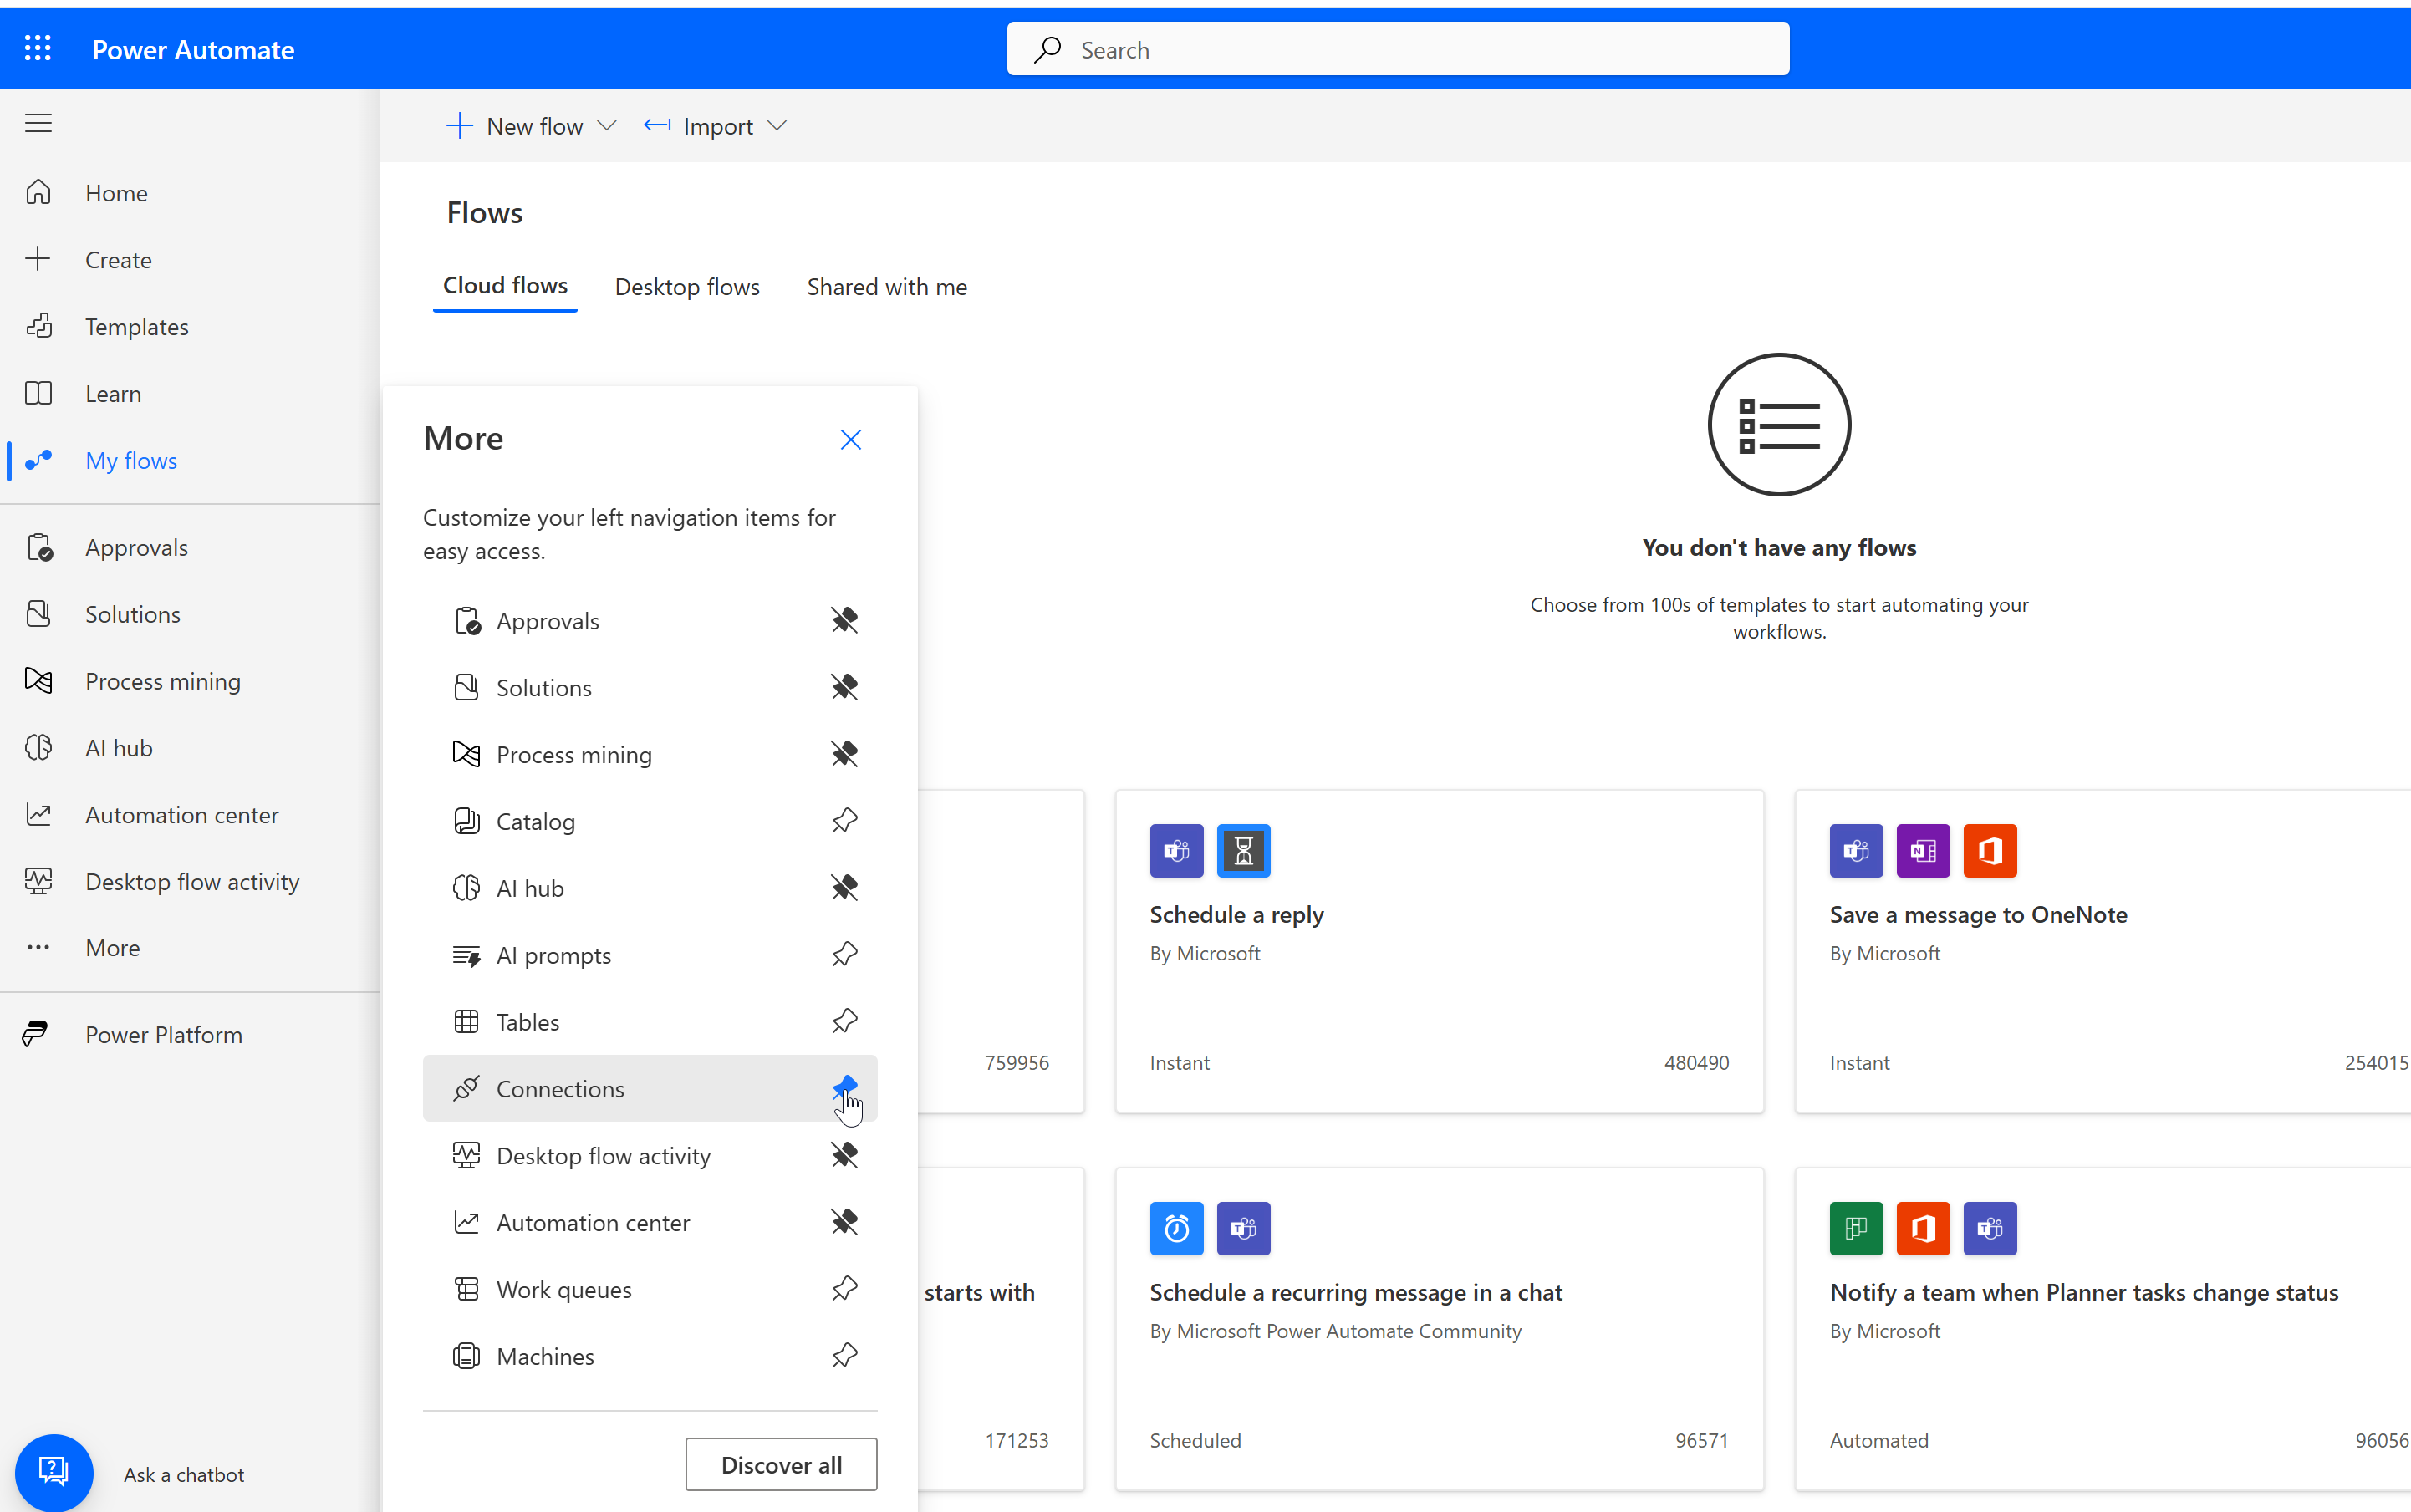
Most probably, you will not see a section with connections, and you'll need to pin it, to become visible, as shown in the screenshot below:
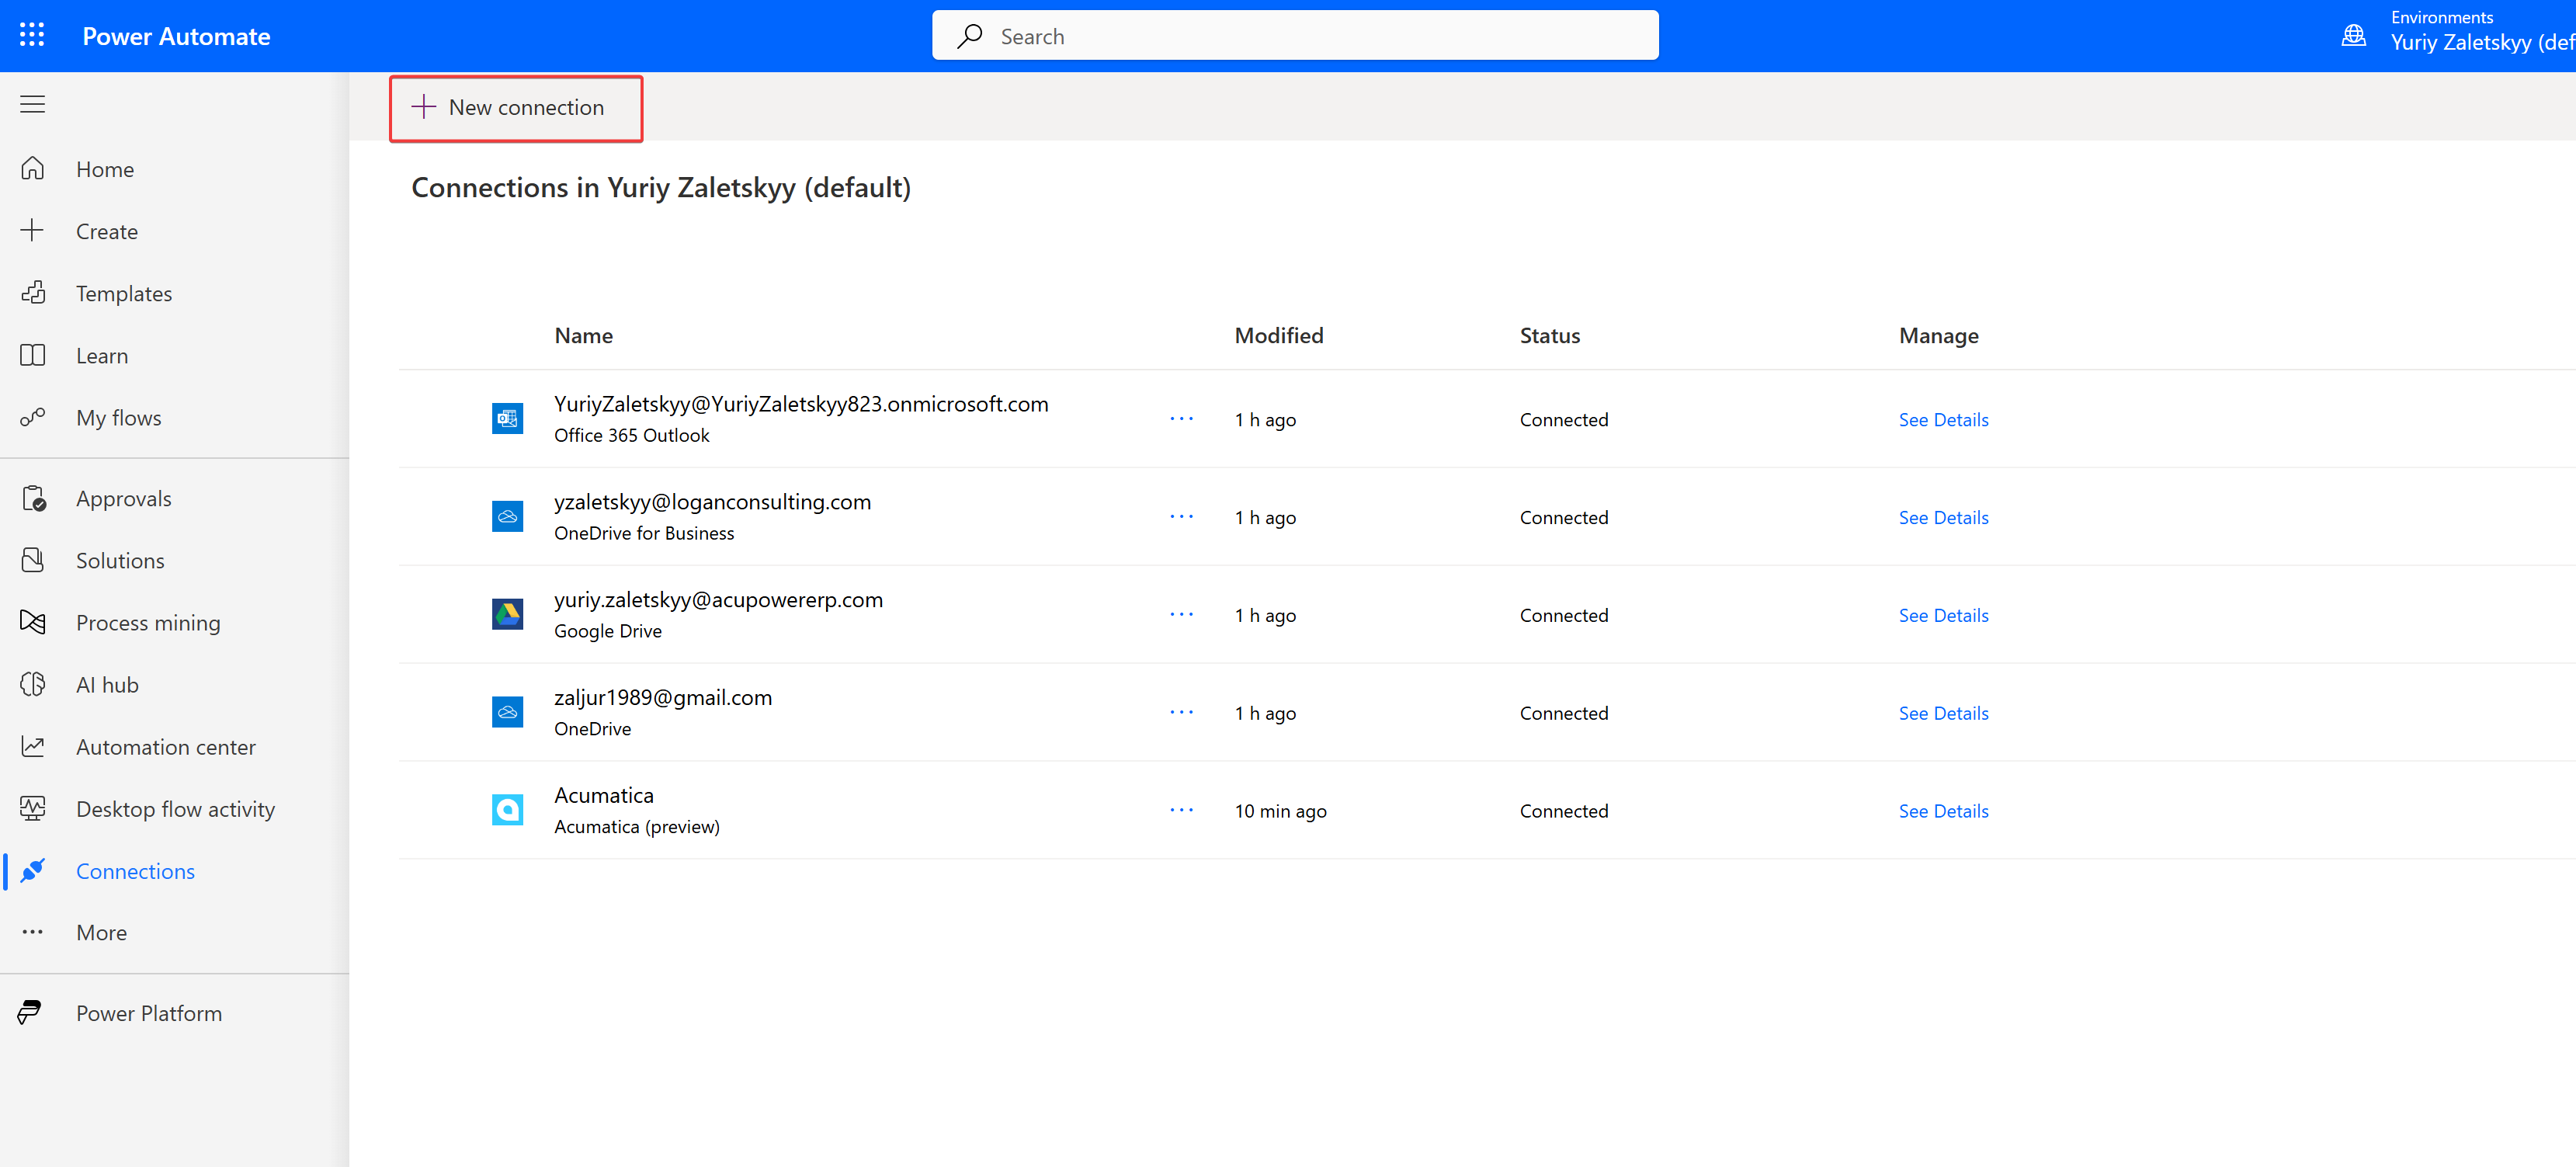
3. Click on New connection above:
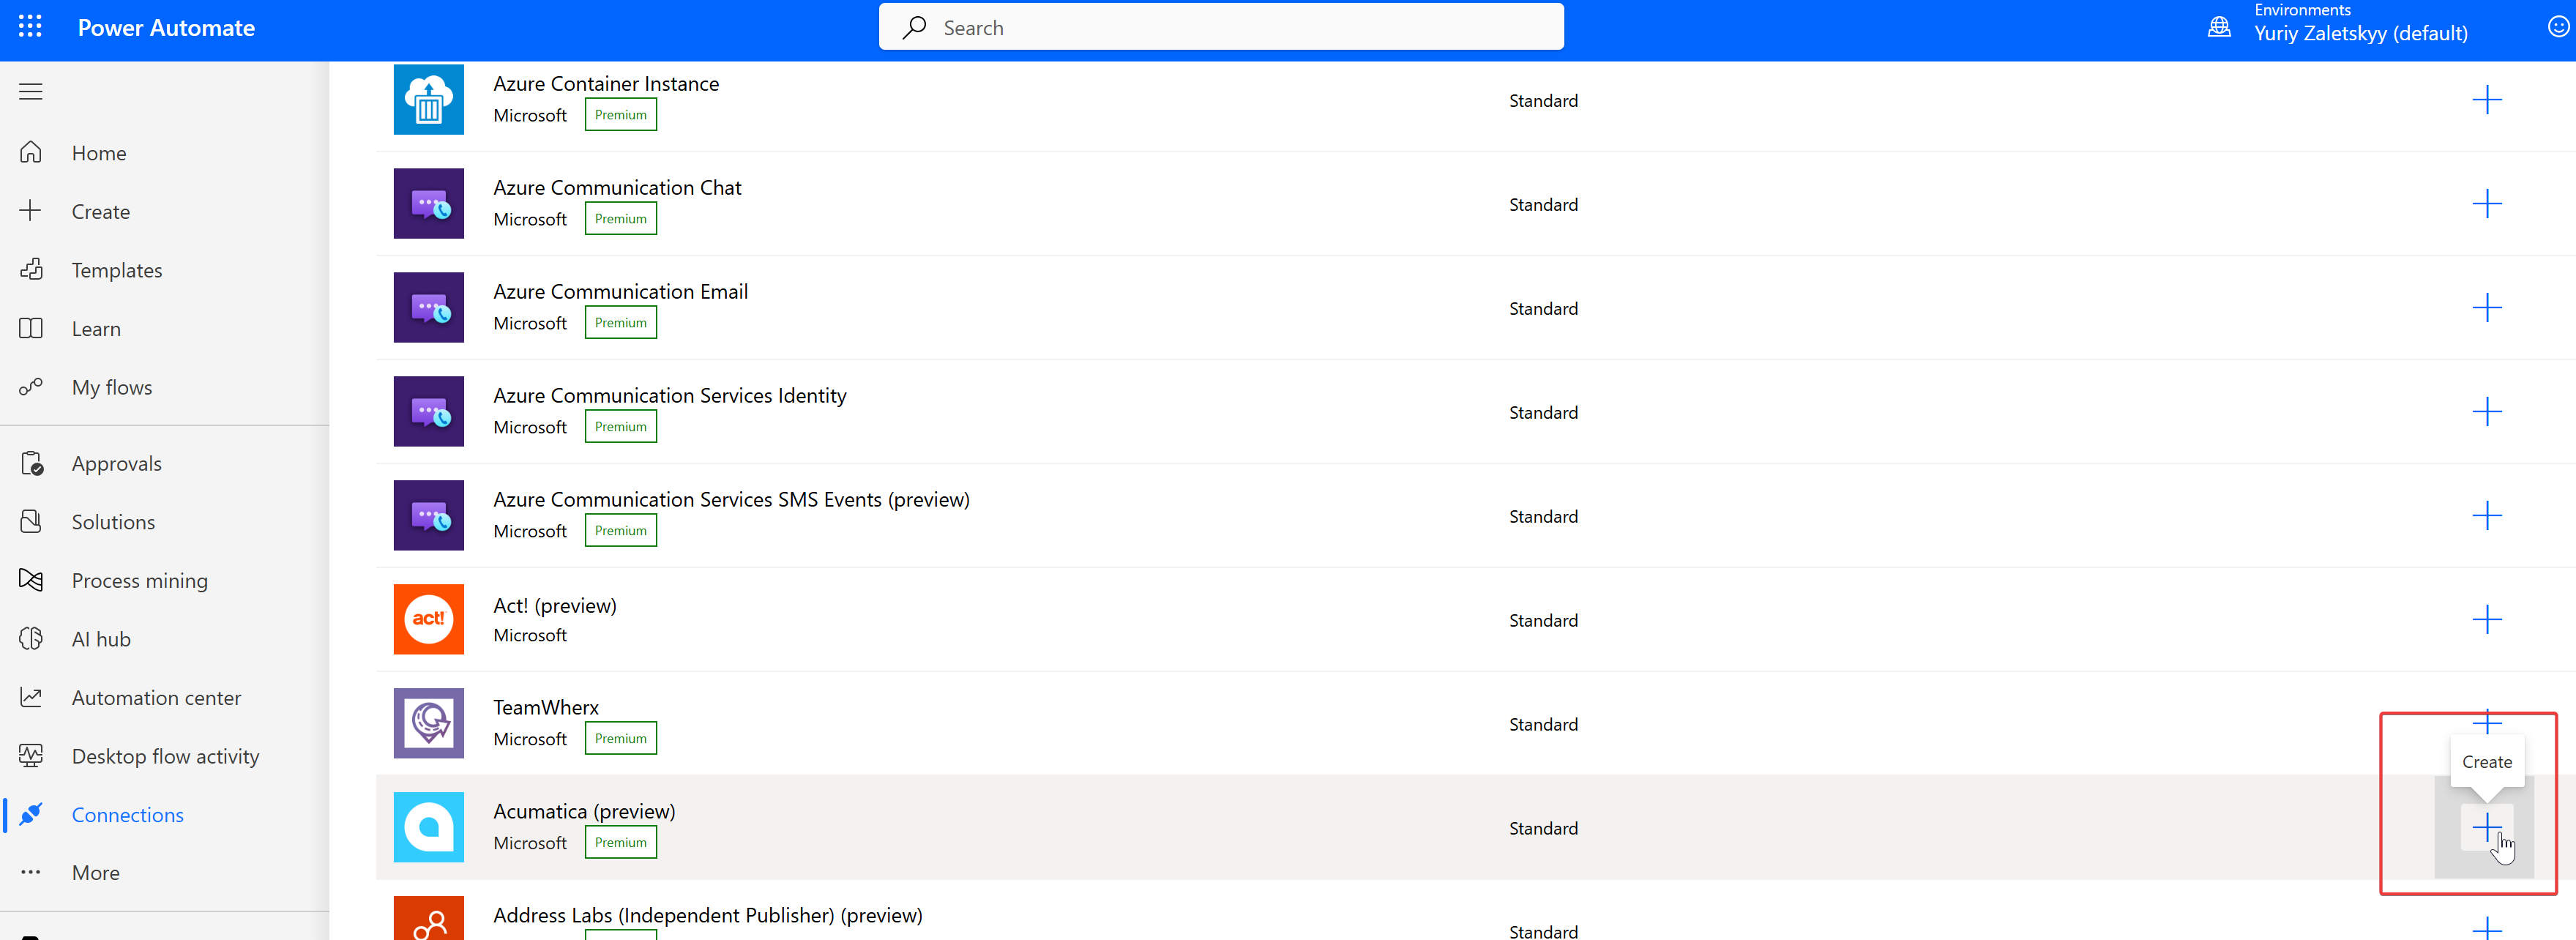
4. Scroll down until you find Acumatica, which is still in preview, as shown on the screenshot, and click on plus
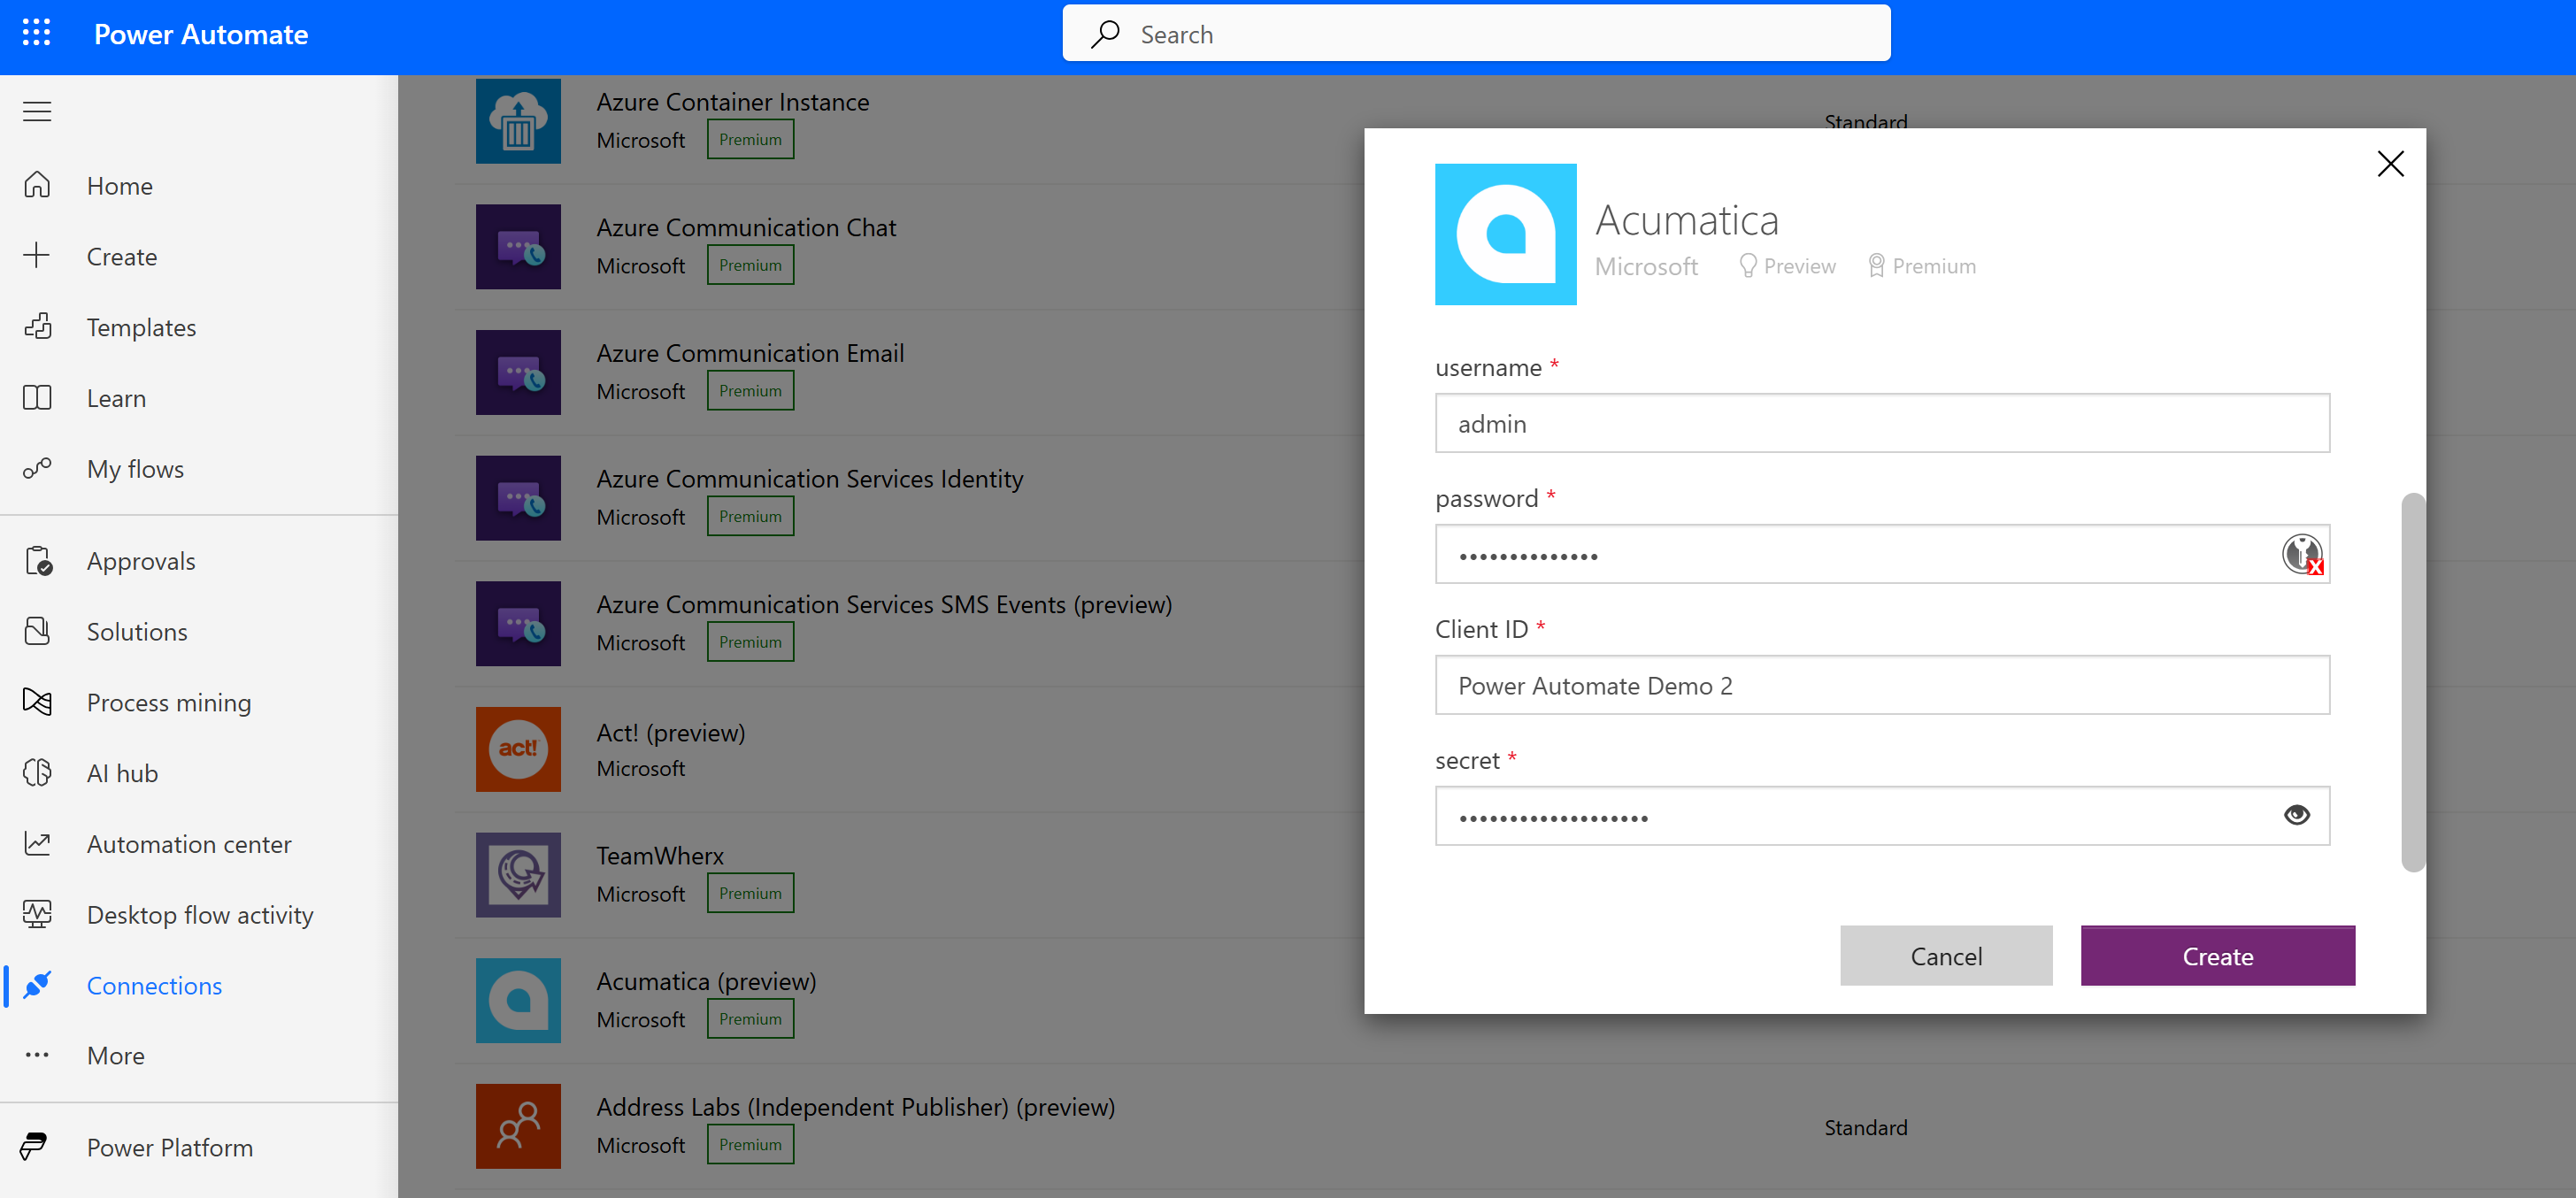
5. The pop-up window will open, which will require you to fill in some information:
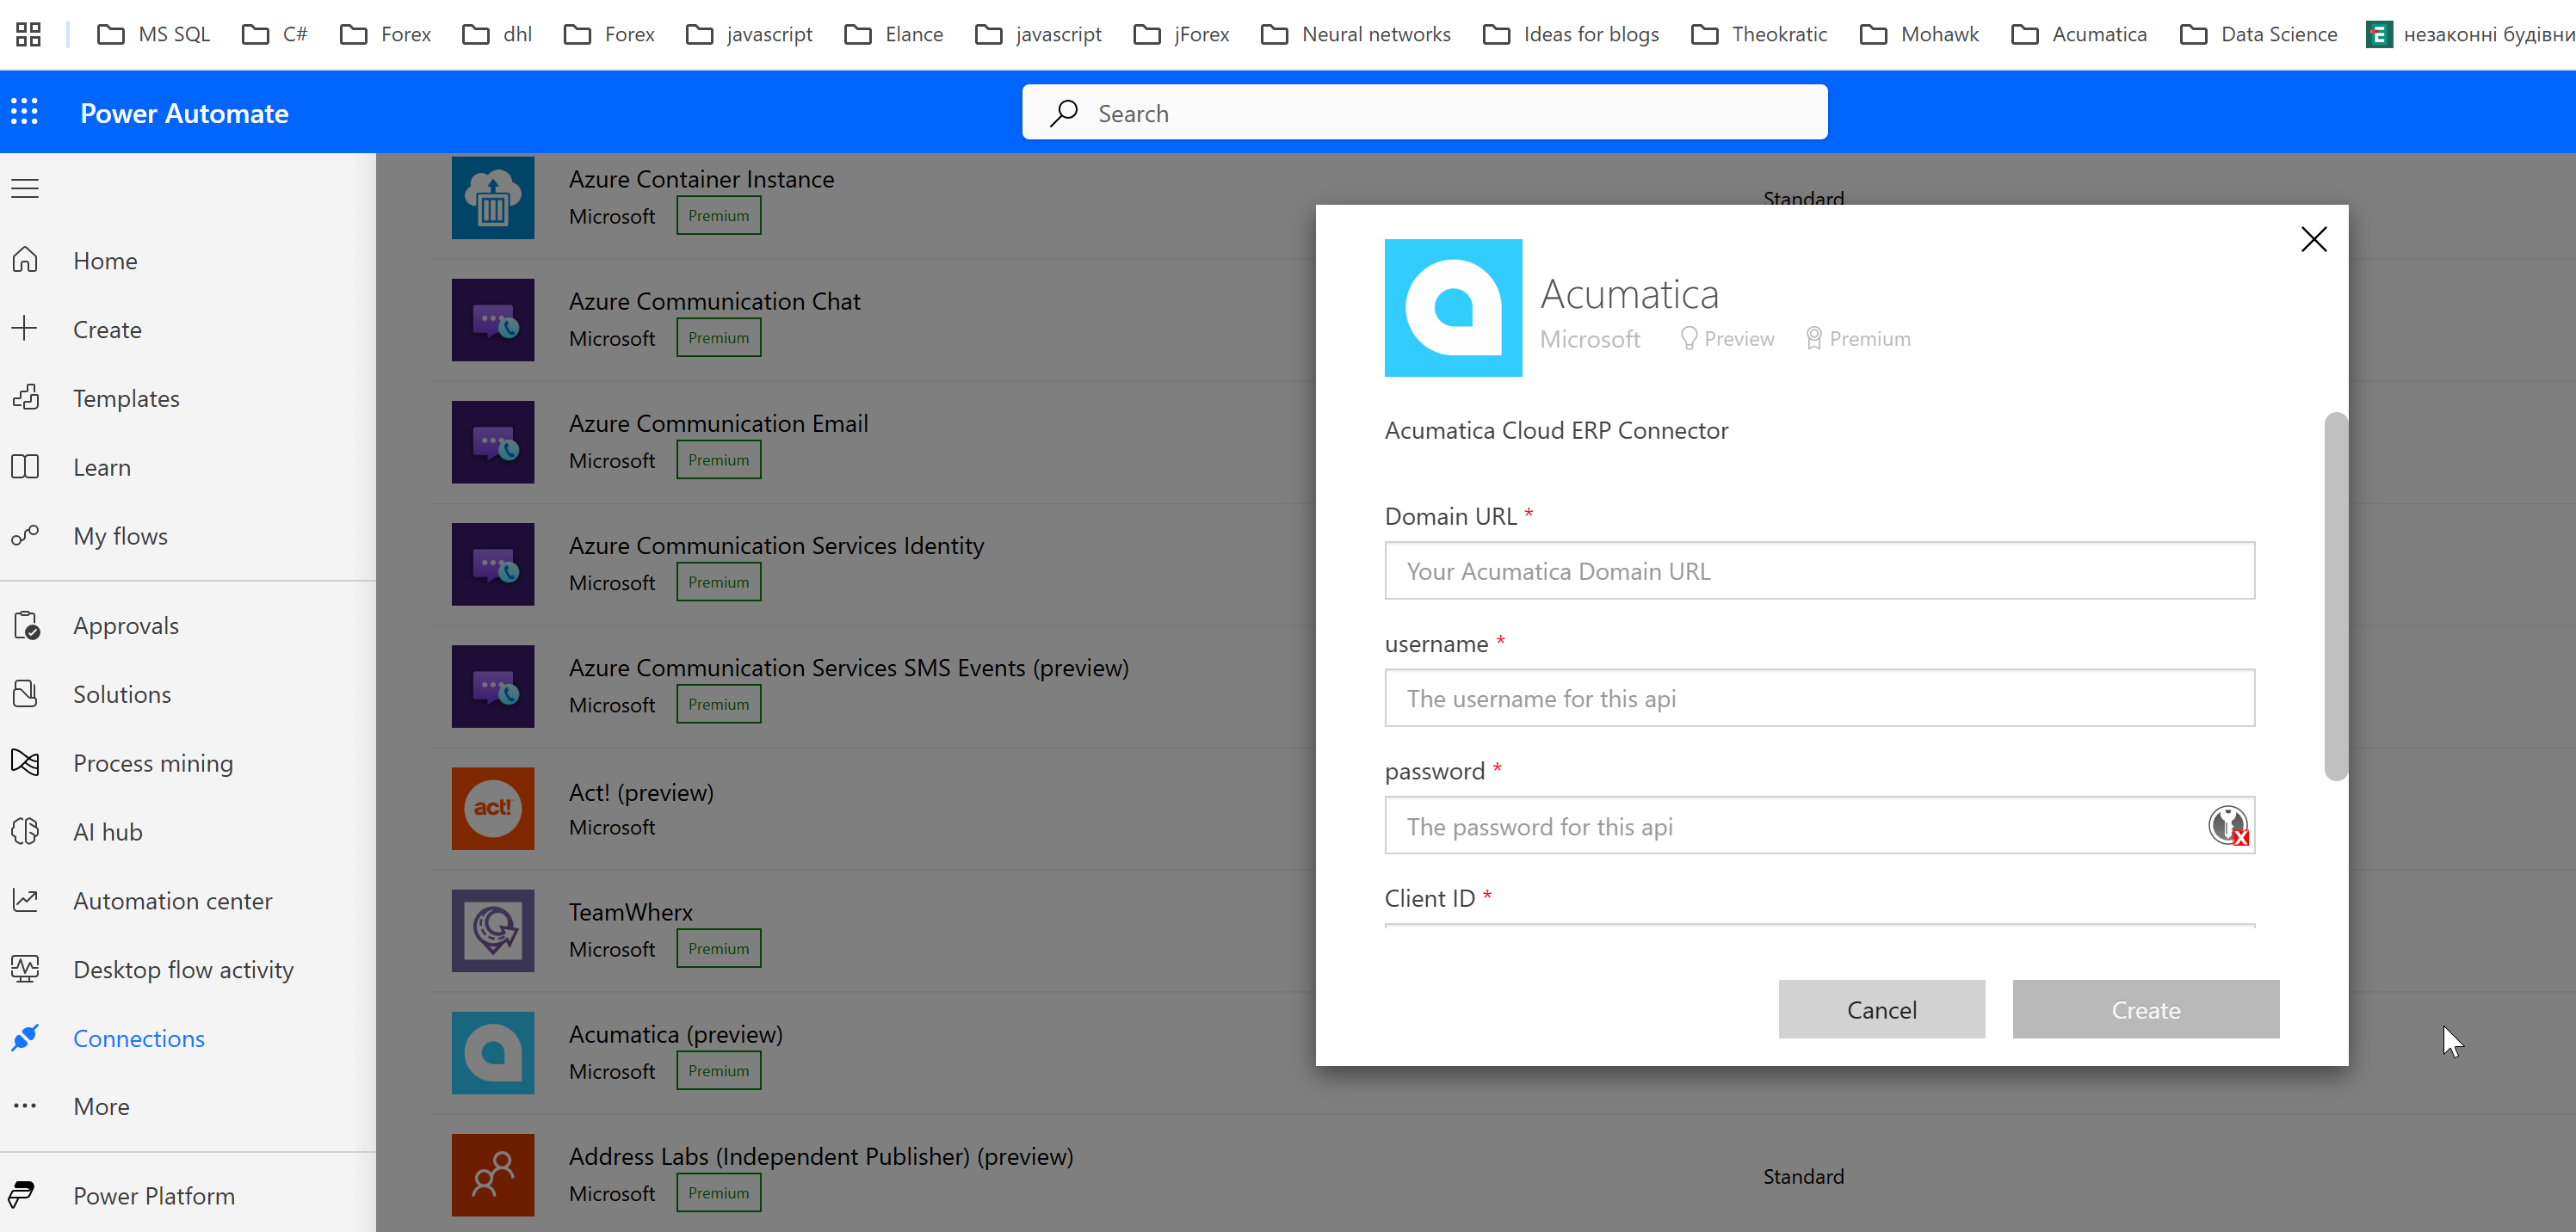
6. We'd assume that you know how to enter your Acumatica domain URL, user name, and password. If you need help with this step, please see our video instructions below.
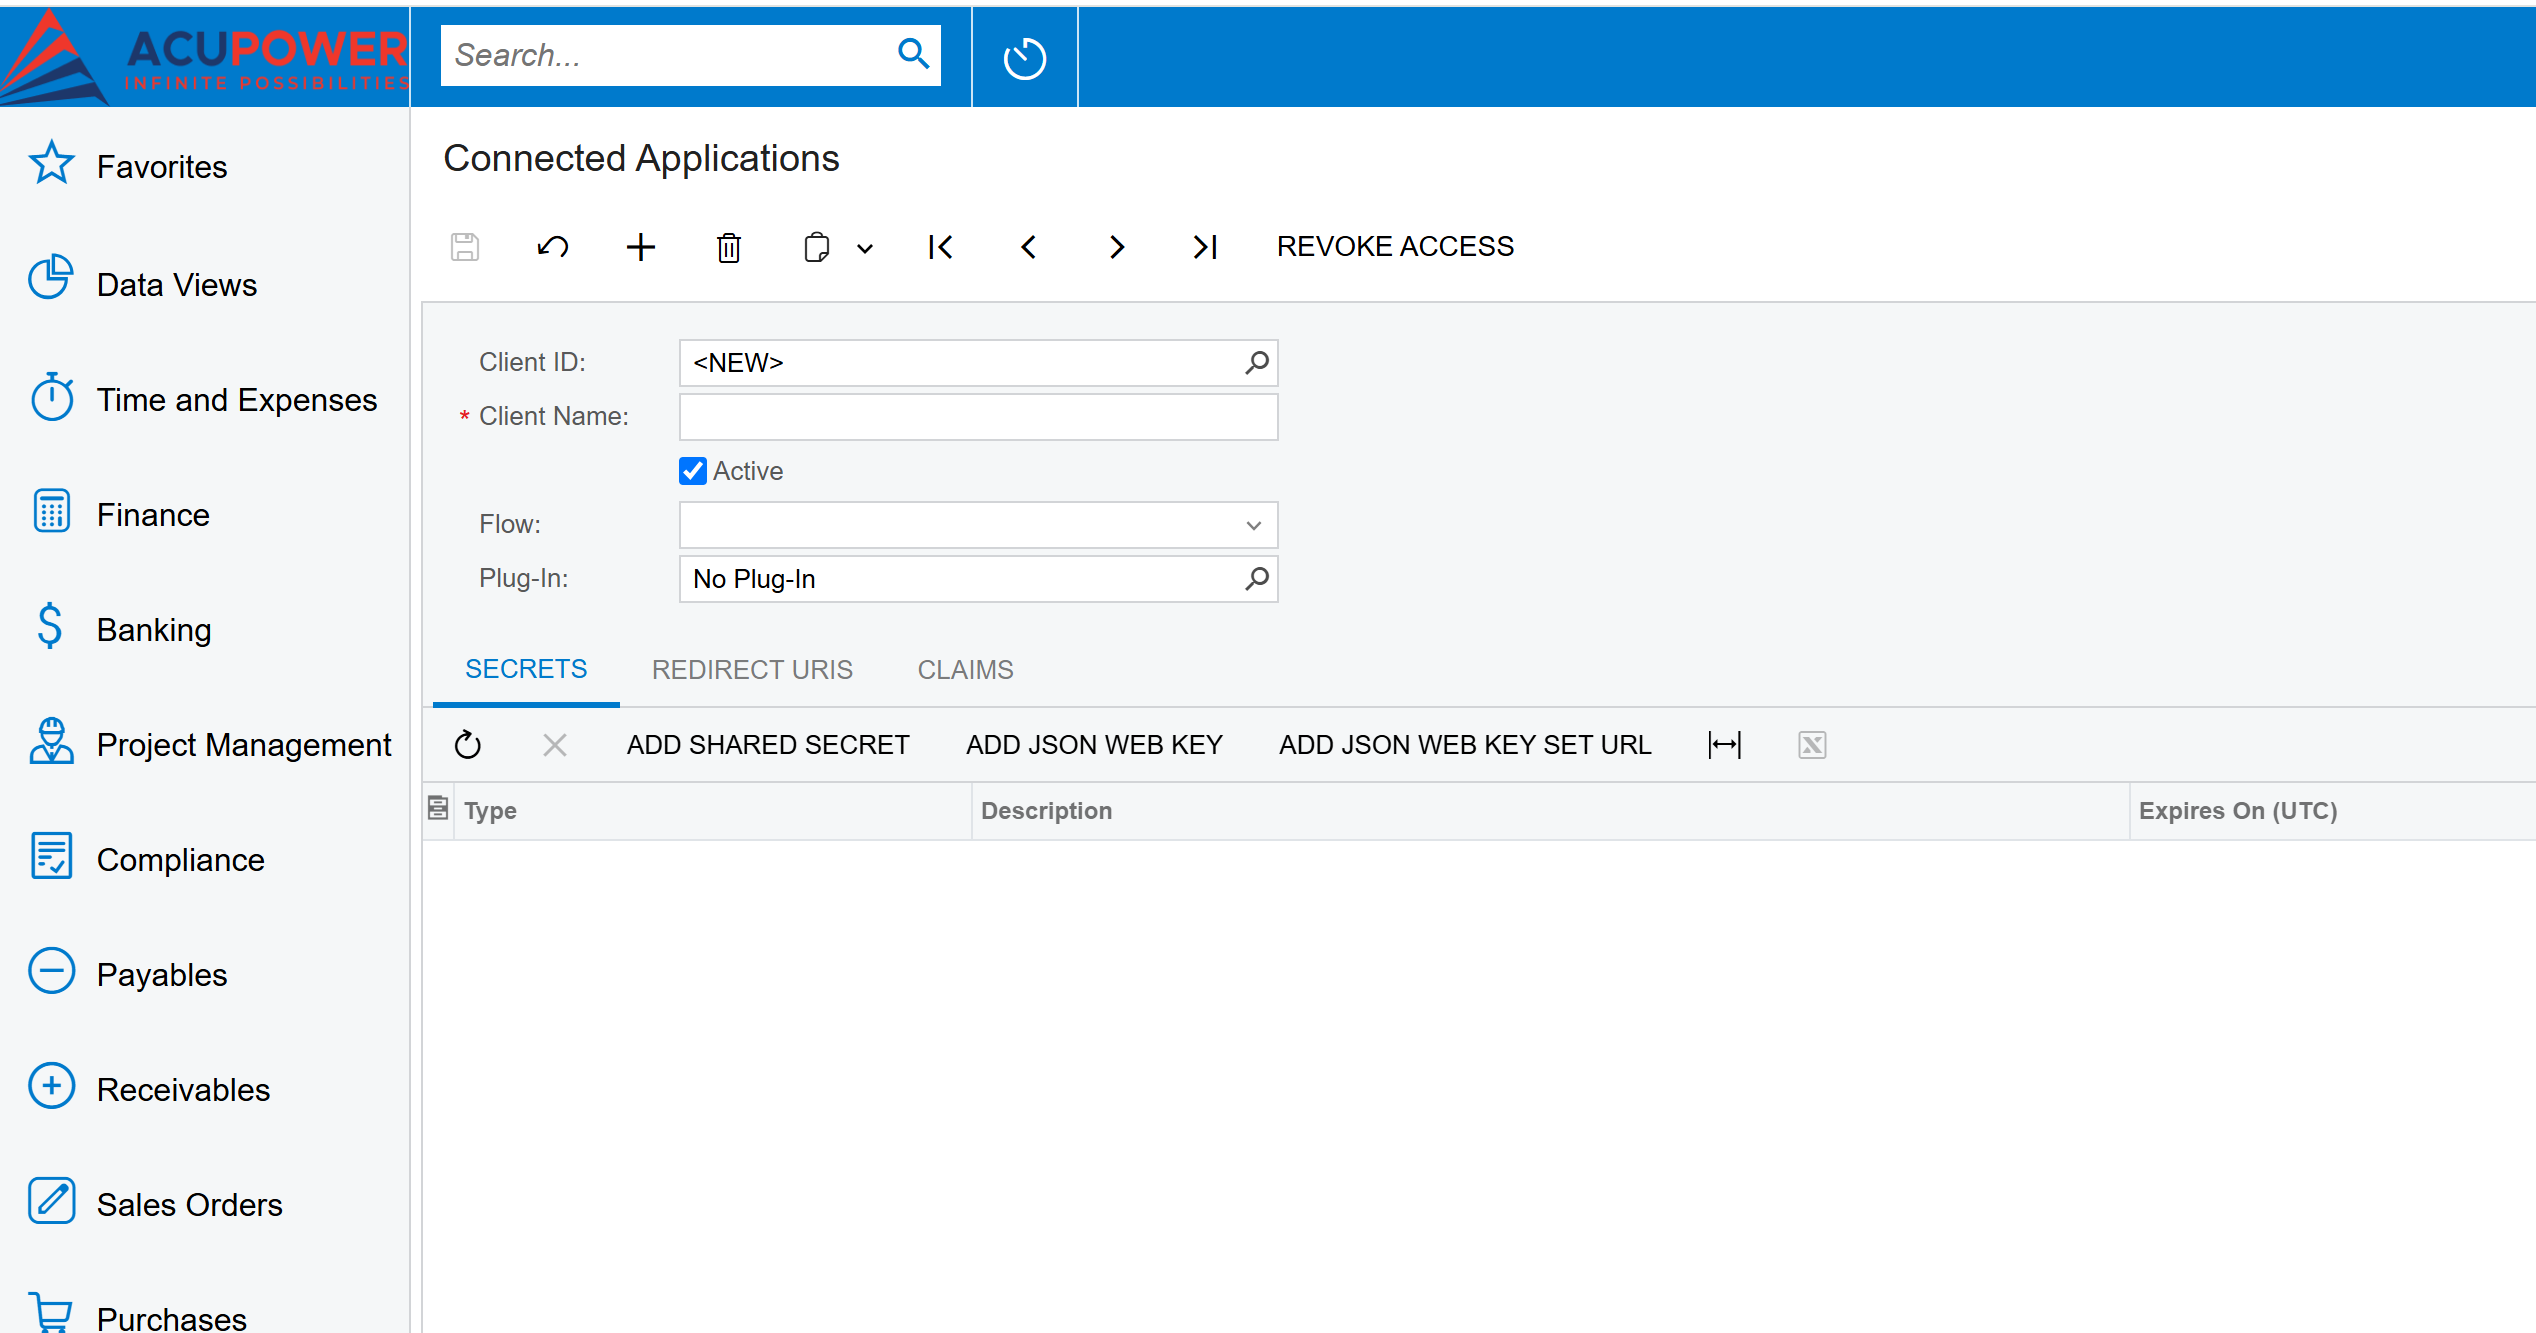
7. But for the Client ID and secret, in your Acumatica instance, you need to sign in to Acumatica and navigate to the Connected Applications page:
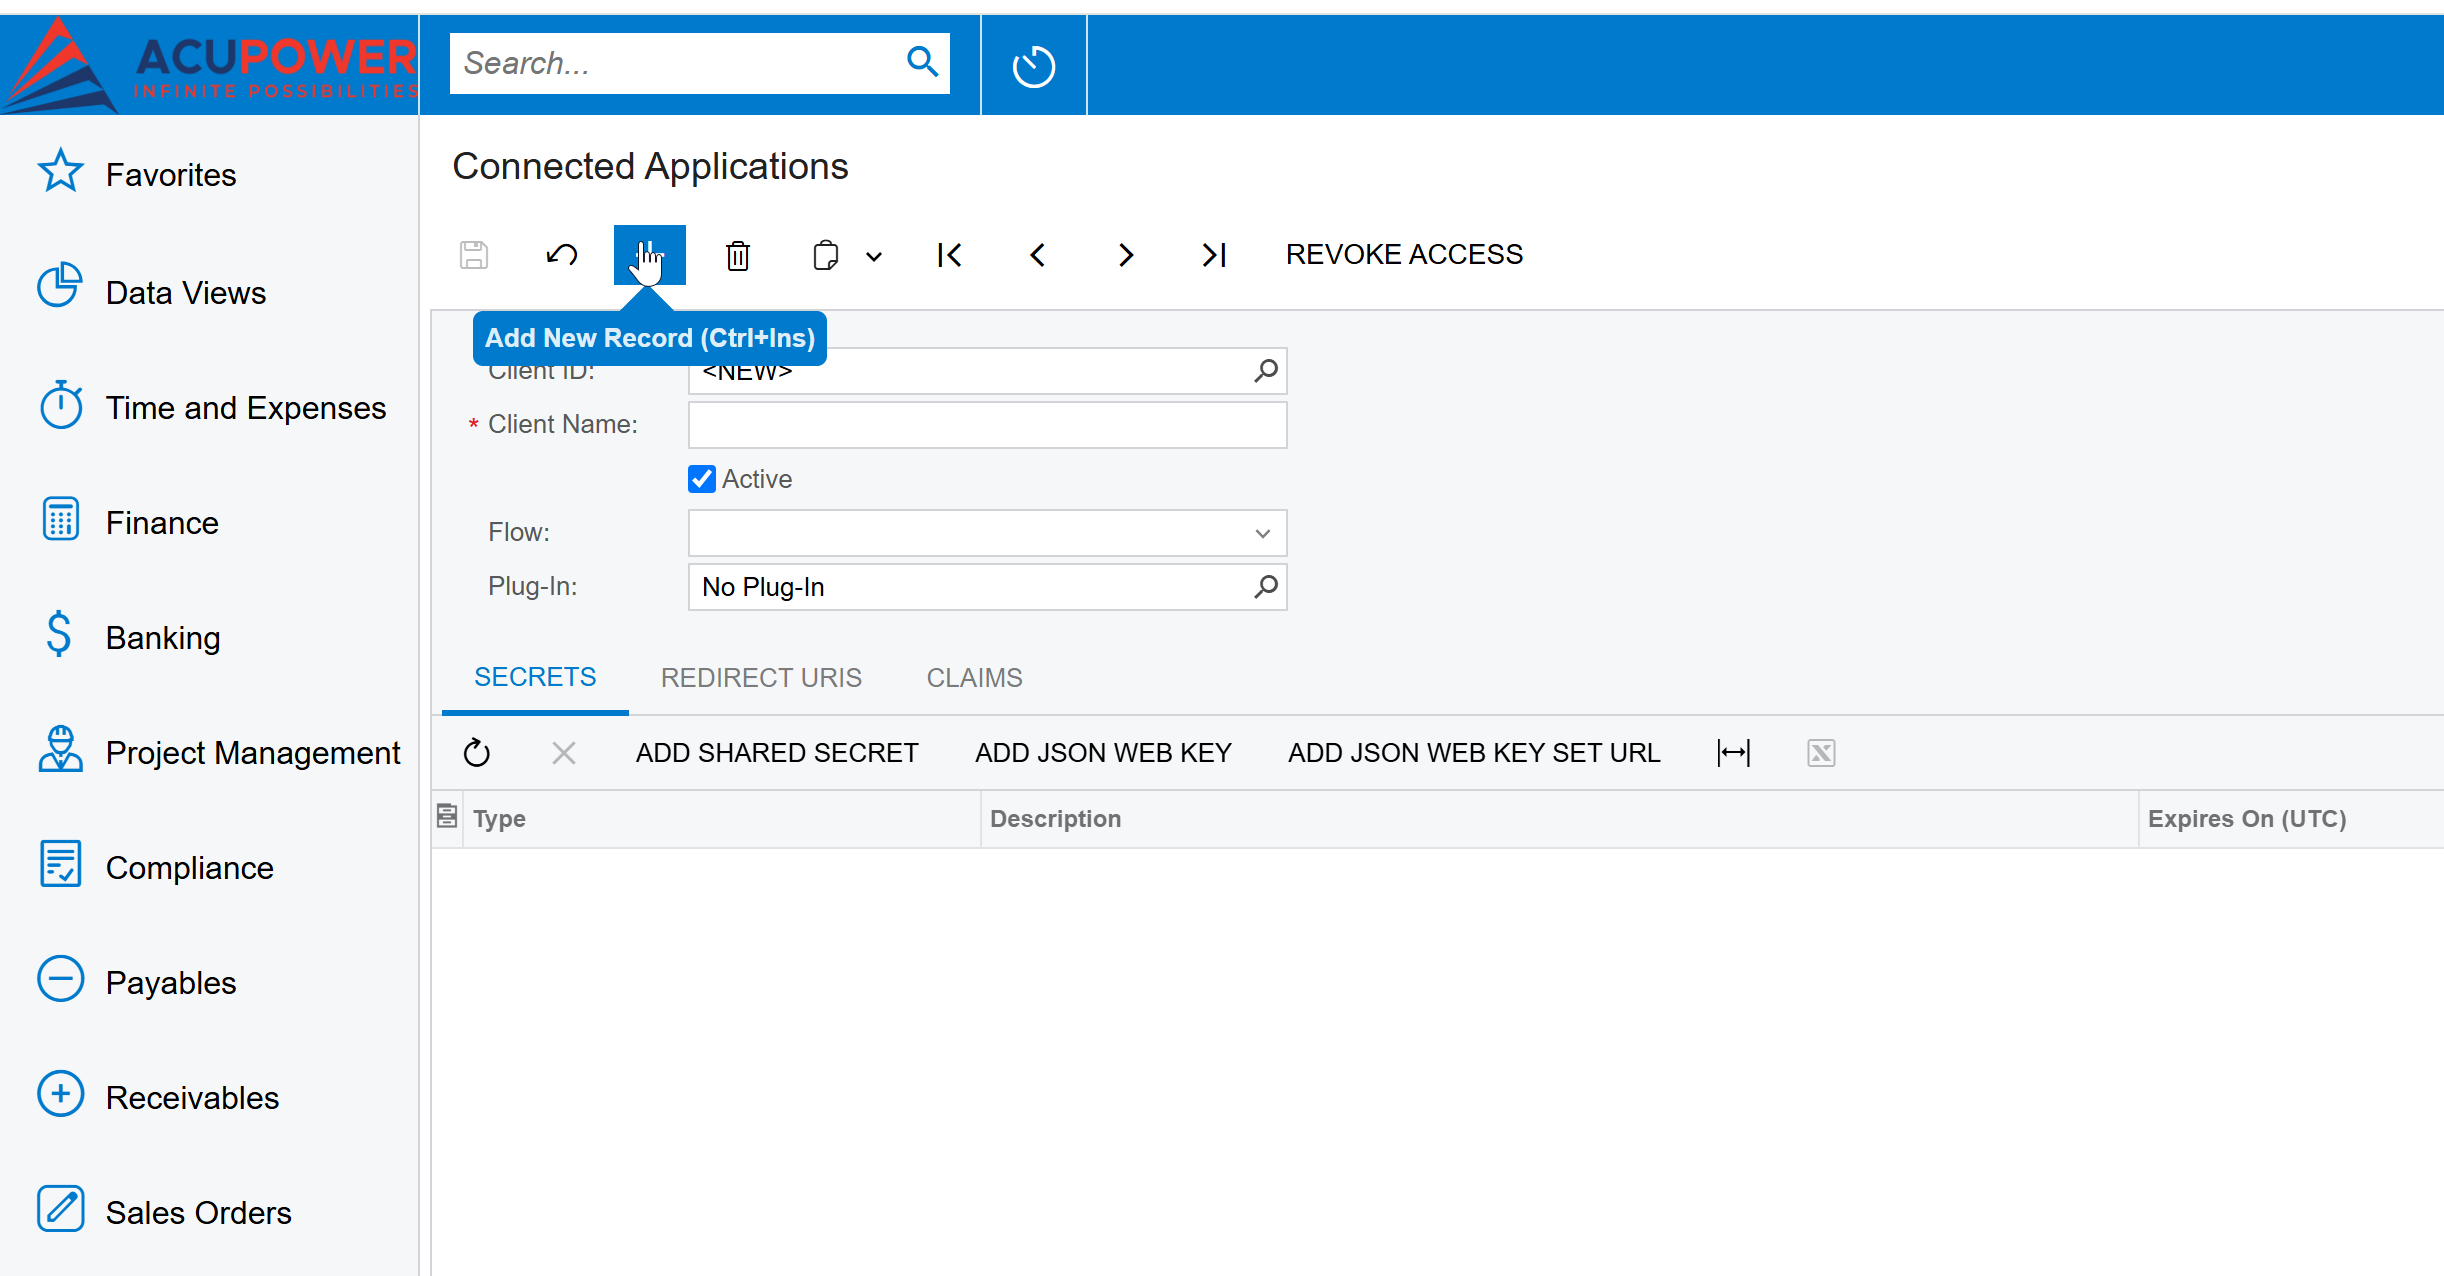
8. Click on the big plus on the left of the delete button:
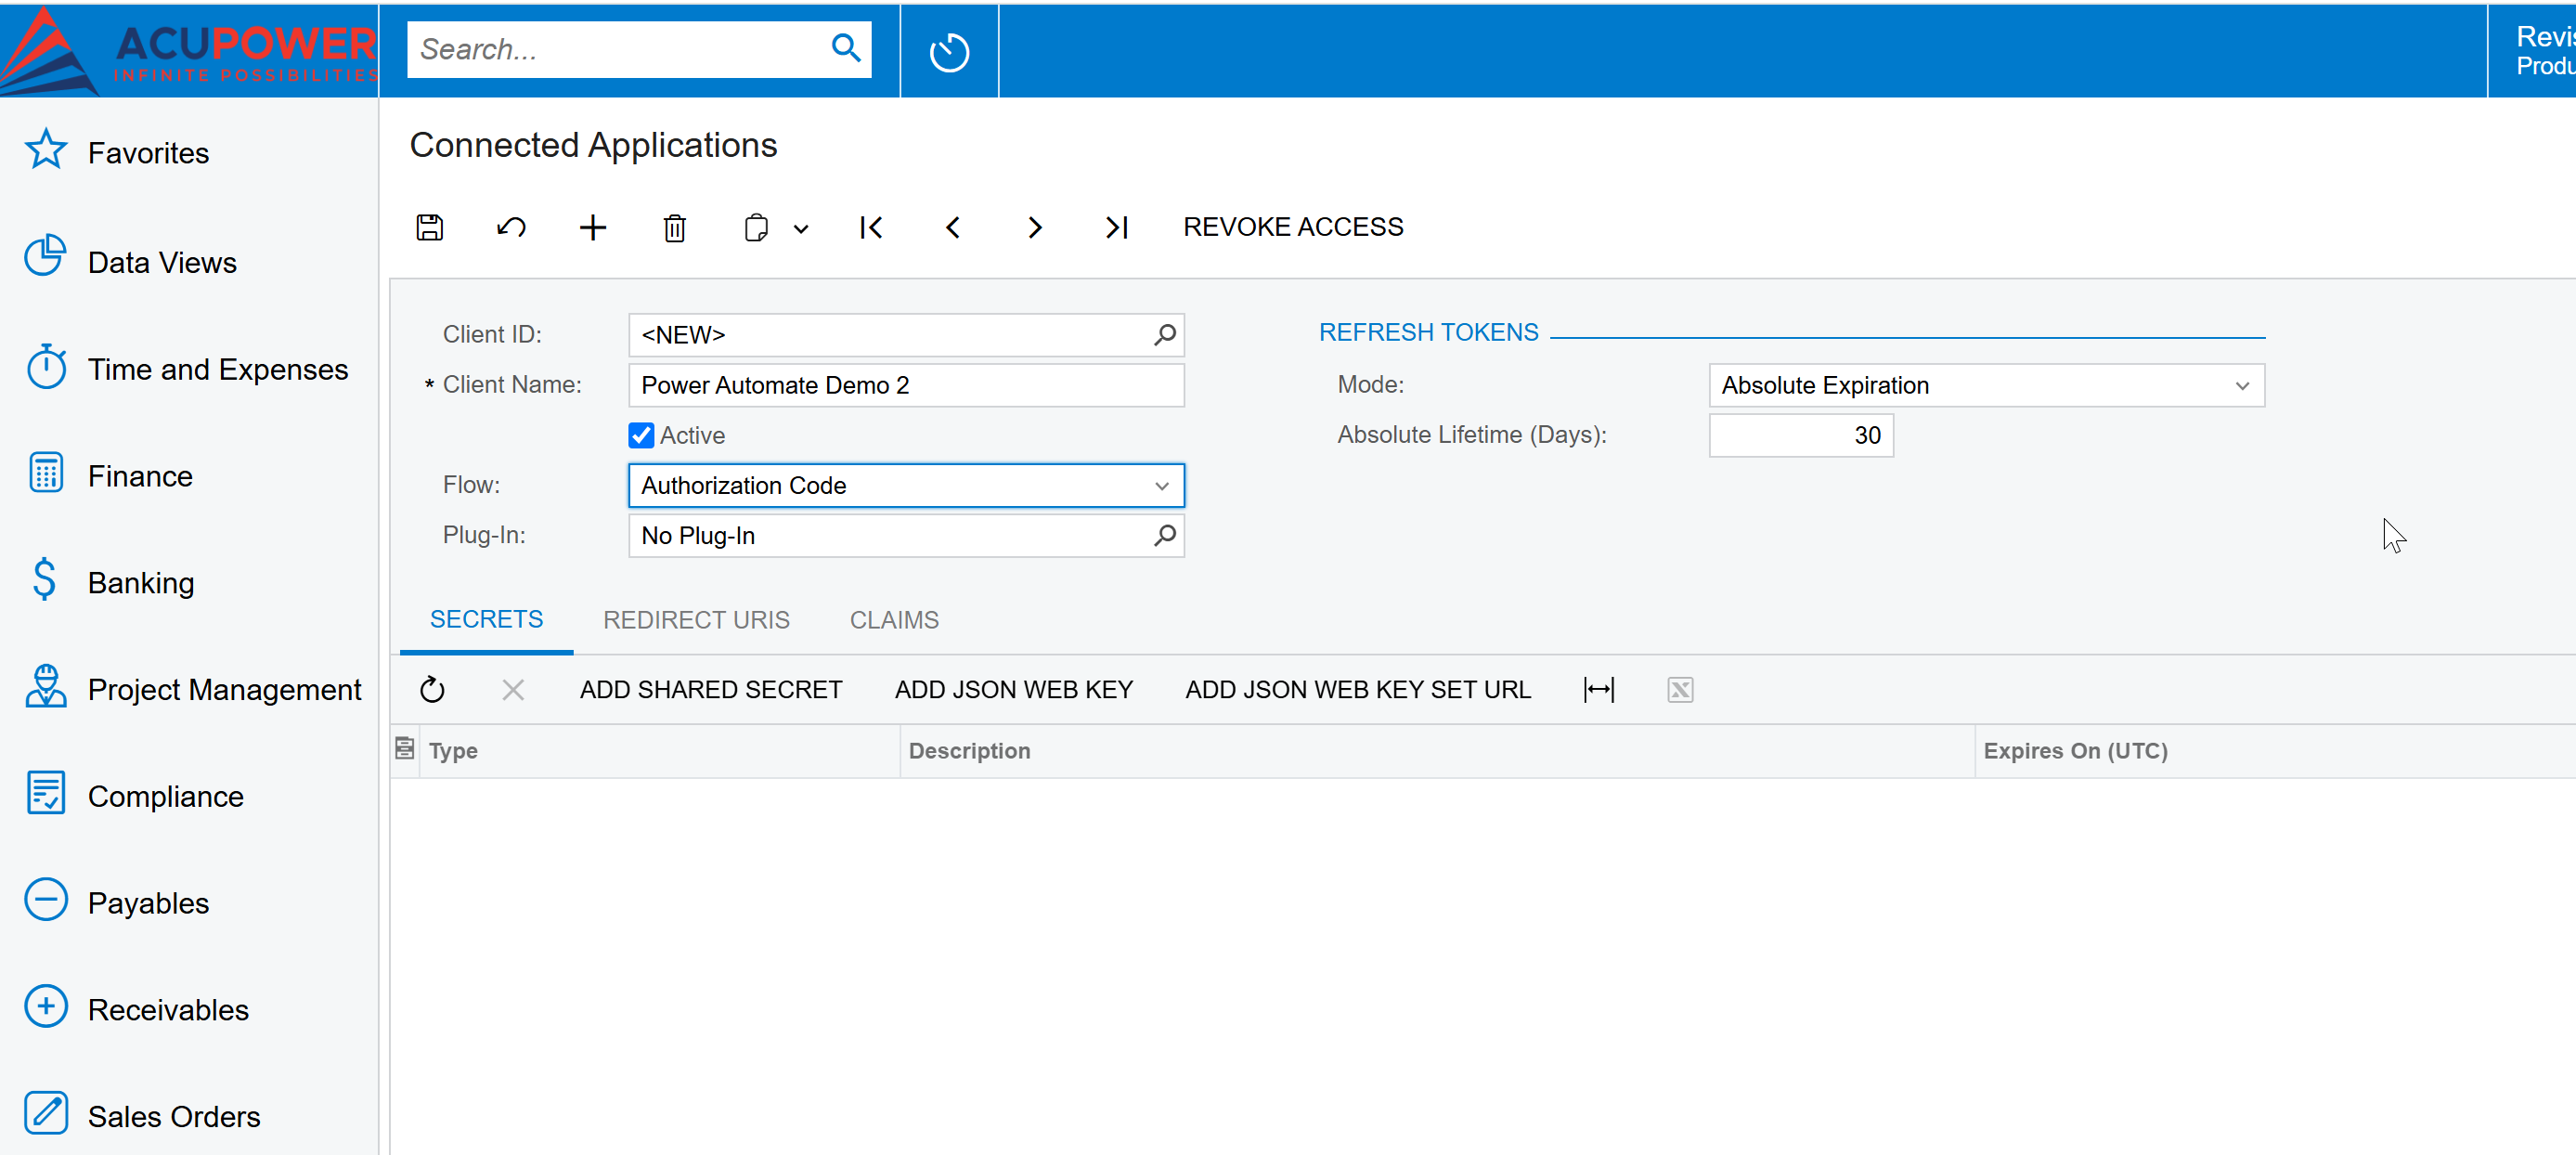
9. Enter some name to Client name, that you will not forget and click on save. We'll enter Power Automate Demo 2, and for flow, we'd suggest choosing Authorization Code, as shown below on the screenshot below:
10. Next, click on Shared Secret, and don't forget to copy the secret that will appear.
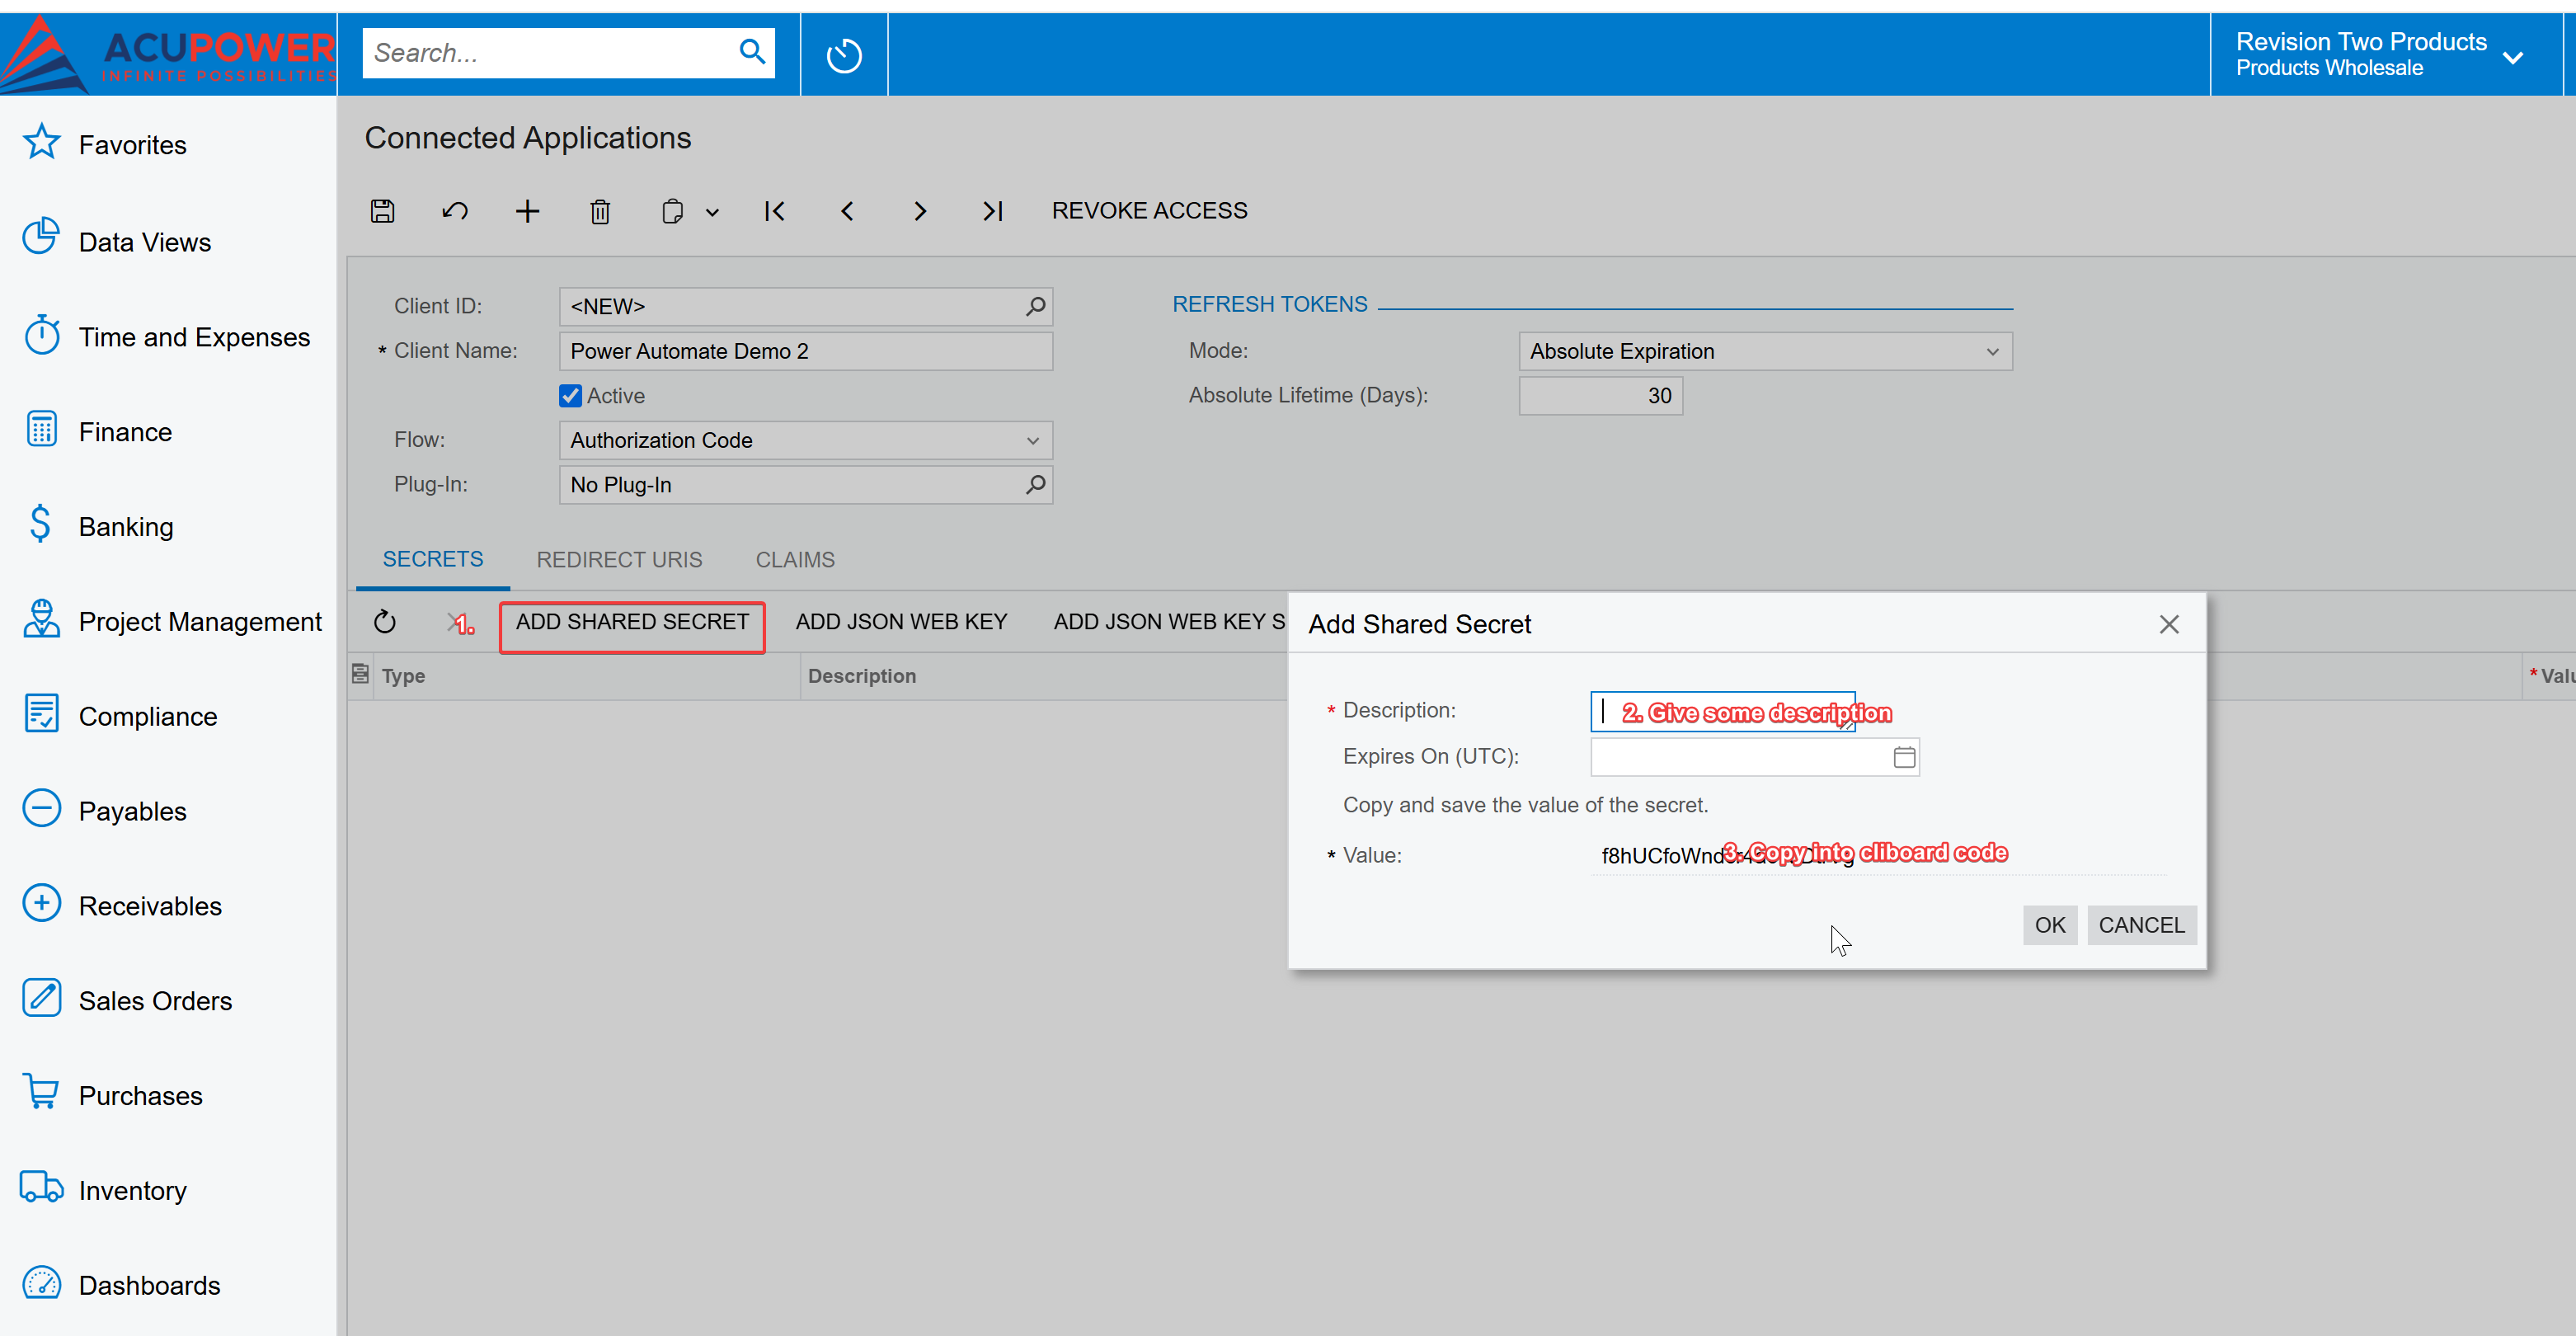
11. Get back to Power automate and enter into Secret what you have in the clipboard and Client ID:
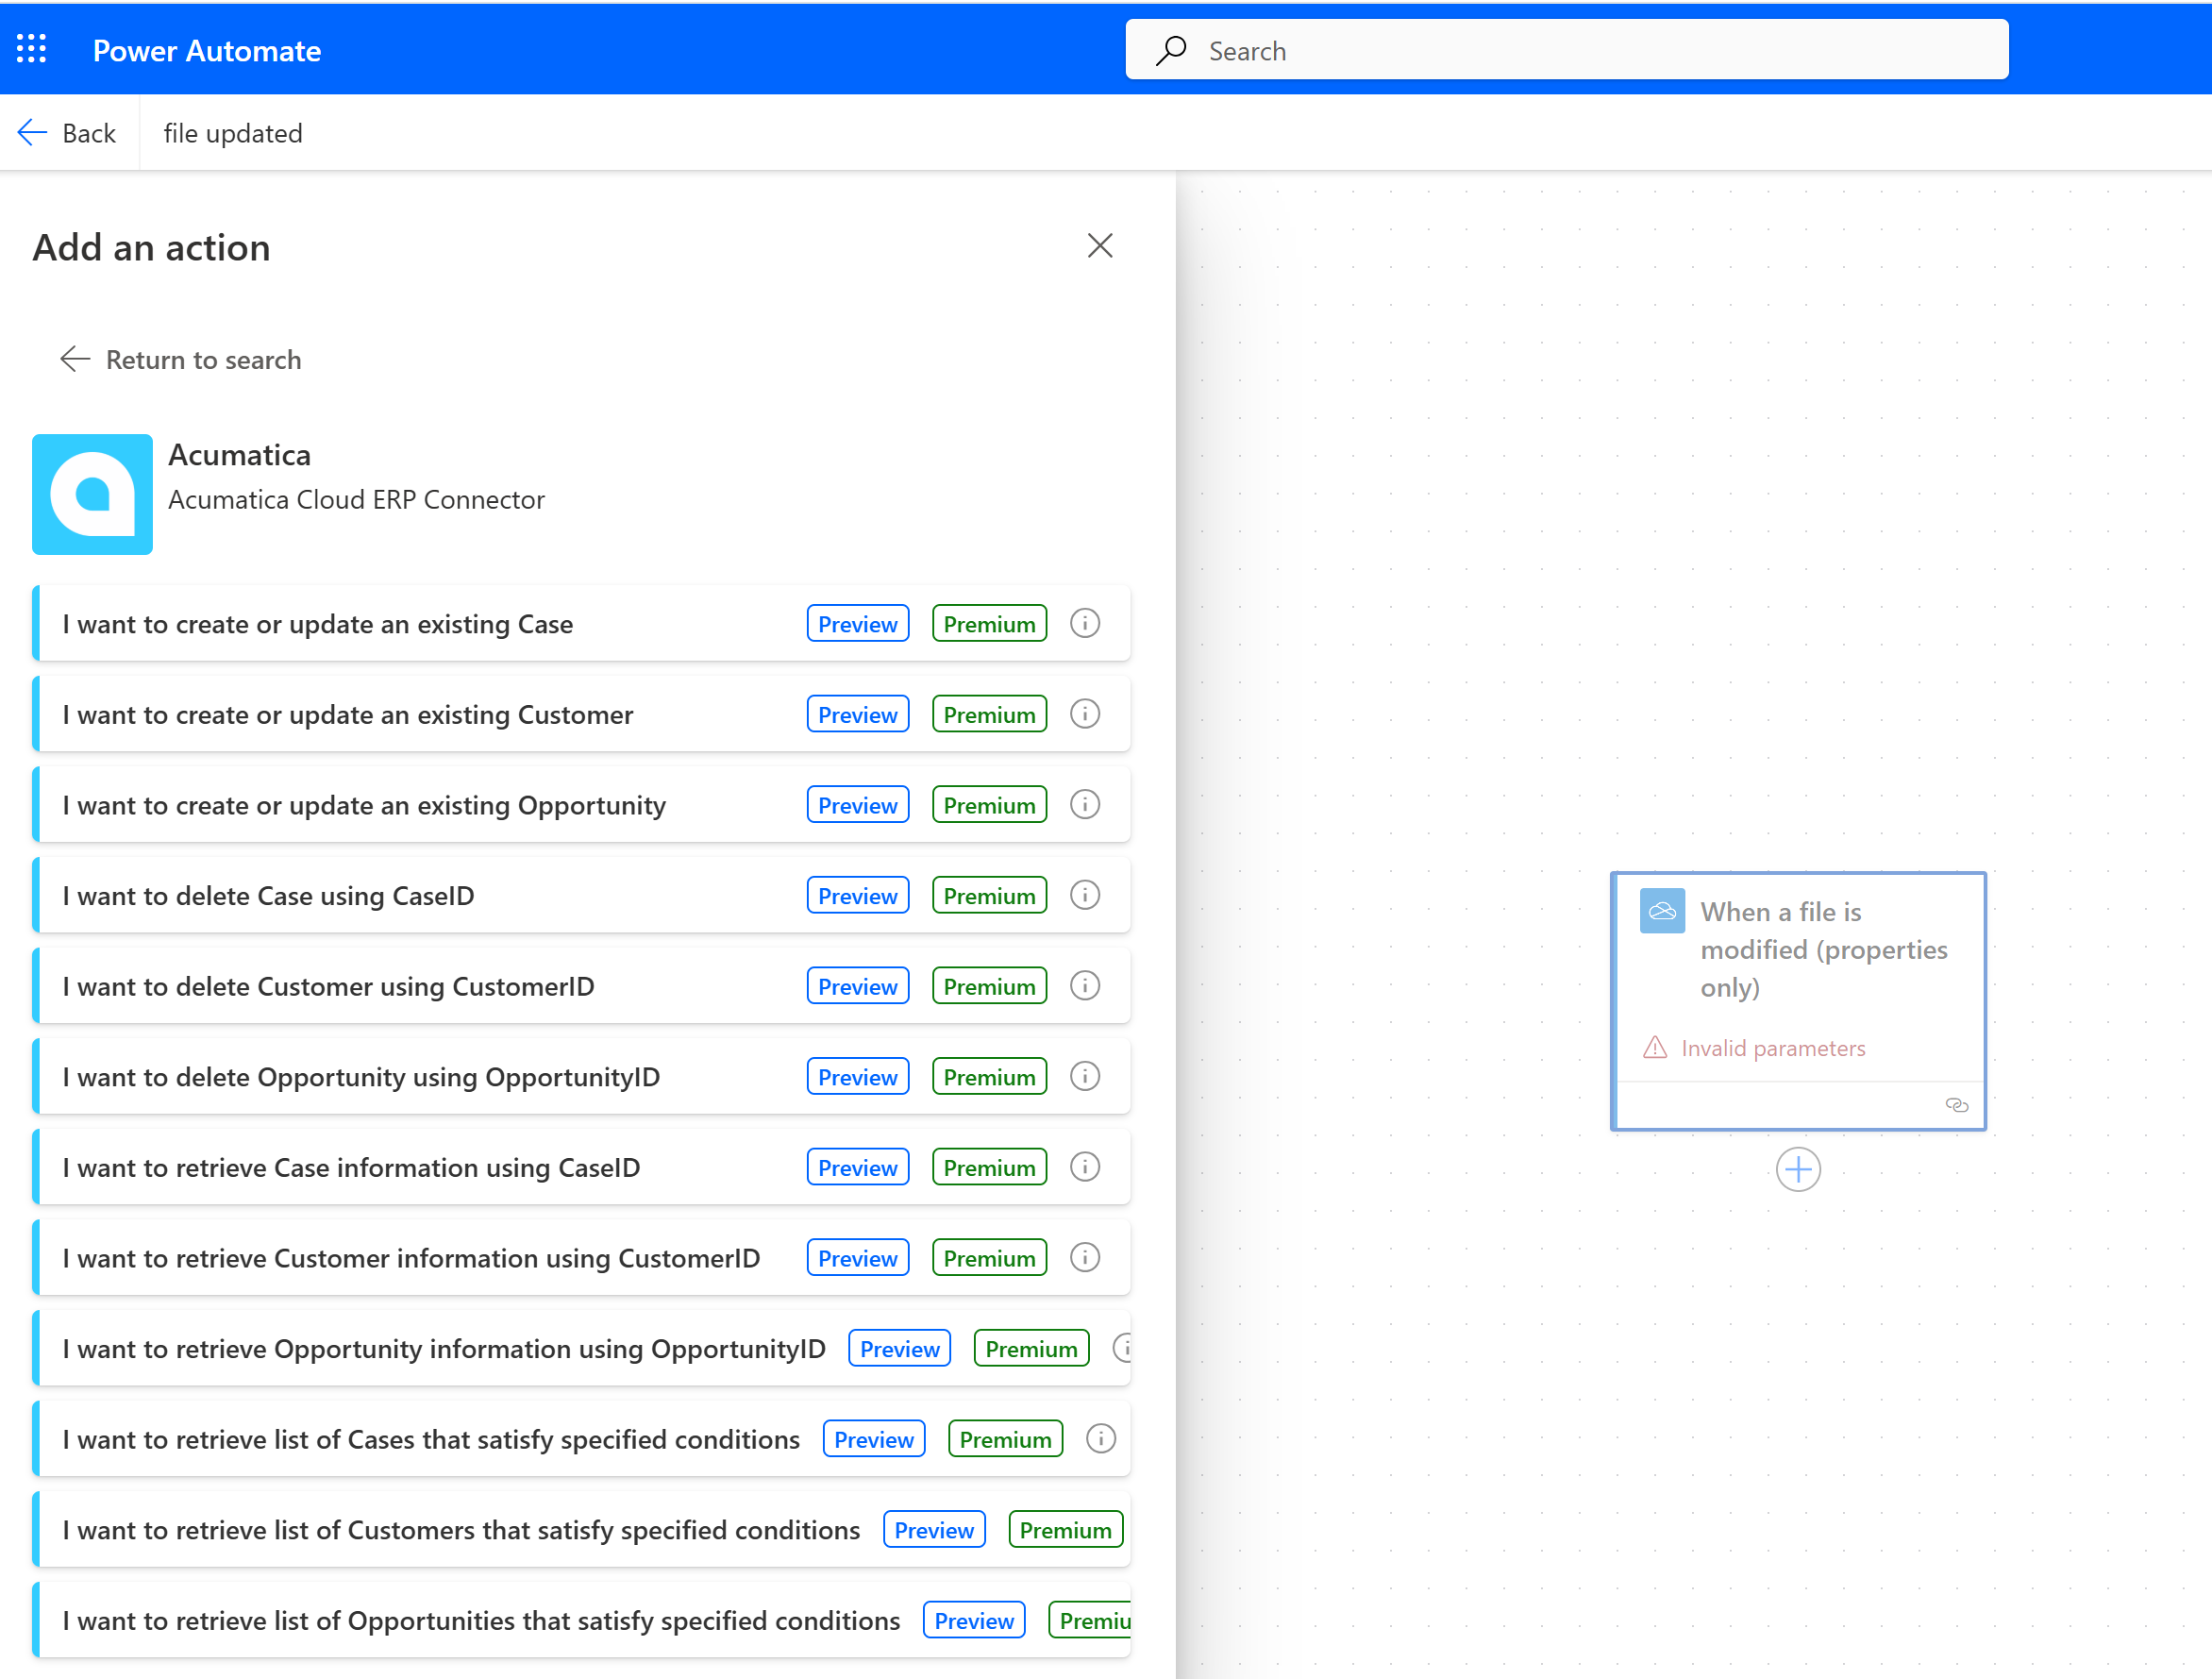
12. After that, you'll be able to use the following items in the connector:
Conclusion: Power Your Business with Automation
By integrating Acumatica with Power Automate, you eliminate inefficiencies, reduce errors, and improve productivity across your organization. At AcuPower, we help businesses like yours maximize the potential of Acumatica—from custom integrations to workflow automation and technical support.
💬 Need help setting up your Acumatica workflows? Our team is here to help. Contact us today to discuss your automation needs!
Comments (0)
No comments yet
Be the first to comment

 3650
3650